 Whalelog
향상된 입력(Enhanced Input)을 사용한 캐릭터 움직임
Unreal Engine 5에서의 Enhanced Input
Enhanced Input
언리얼 엔진은 5.1버전부터 향상된 입력(Enhanced Input)을 기본 입력으로 사용한다. 자세한 내용은 공식문서 참고. 이 향상된 입력을 사용하여 캐릭터 움직임을 만들어보고자 한다.
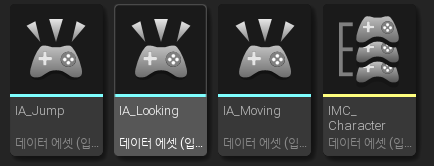
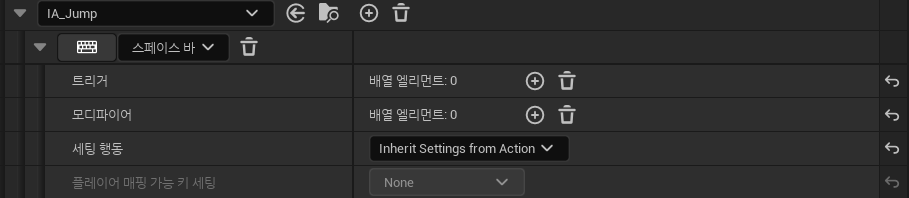
IA, IMC 생성
BluePrint
TPS의 기본에 해당하는 3가지 동작을 만들 것이다. 키보드를 사용한 2D 움직임 / 마우스를 사용한 시야 움직임 / 스페이스바를 사용한 점프가 그것이다.
각각의 동작은 InputAction으로 생성한다. Moving과 Looking은 값 타입으로 Axis2D를, Jump는 bool을 사용했다. Axis2D는 FVector2D이며 소수점 단위의 X, Y로 구성된 2D 공간상의 벡터이다.
그리고 이들을 키에 매핑 하기 위해 InputMappingContext를 생성하여 설정을 진행했다.
IMC_Character(InputMappingContext)
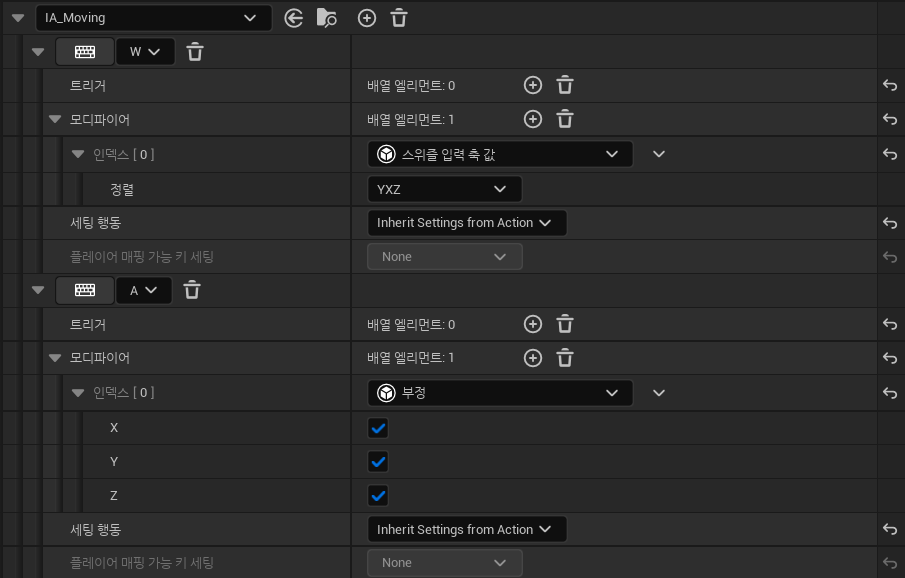
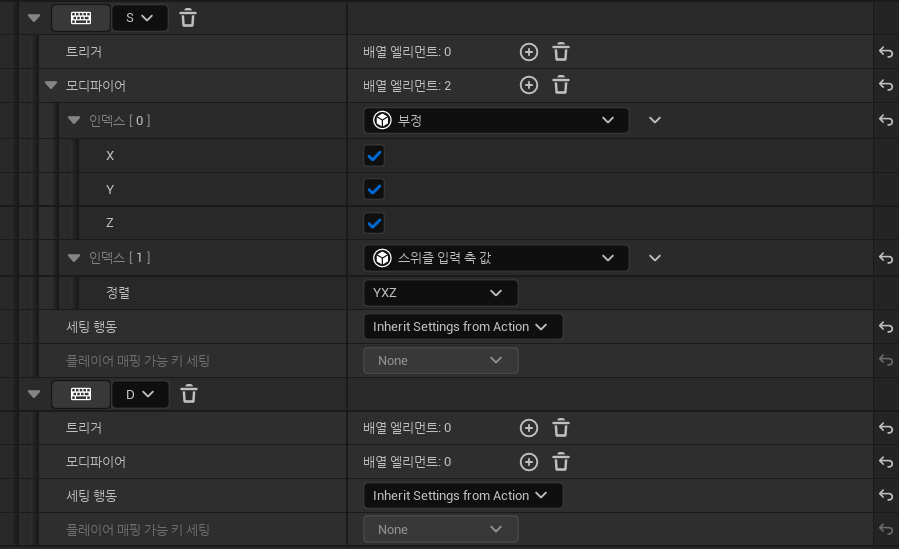
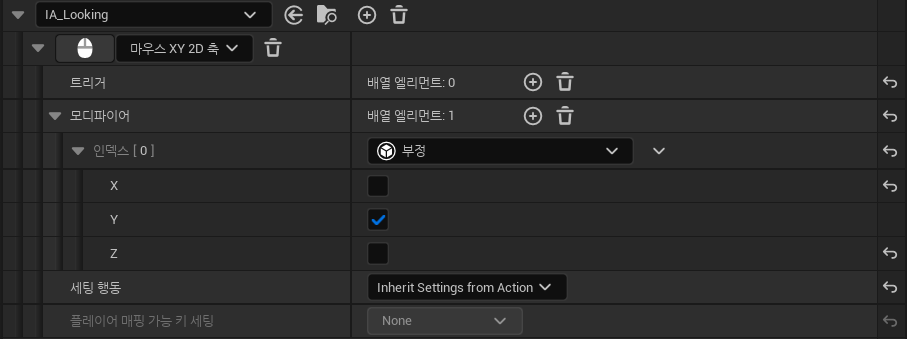
각 동작의 매핑 값은 아래와 같다. WASD 동작의 경우 위의 공식 문서를 참고.
Character 클래스 생성
입력과 키 매핑을 생성했으니 이를 사용할 캐릭터 클래스를 생성한다. Character를 부모로 하는 DefaultCharacter 클래스를 생성했다.
DefaultCharacter.h
// Input Section
protected:
	UPROPERTY(EditAnywhere, Category = "Enhanced Input")
	class UInputMappingContext* InputMappingContext;

	UPROPERTY(EditAnywhere, Category = "Enhanced Input")
	class UInputAction* Moving;

	UPROPERTY(EditAnyWhere, Category = "Enhanced Input")
	class UInputAction* Jumping;

	UPROPERTY(EditAnyWhere, Category = "Enhanced Input")
	class UInputAction* Looking;

	void Move(const FInputActionValue& Value);
	void Look(const FInputActionValue& Value);
의존성을 낮추기 위하여 전방선언을 사용해 IA, IMC 포인터를 선언한다. Jump는 별도의 함수를 만들지 않았는데, Character에 미리 정의된 함수를 사용할 것이기 때문이다.
DefaultCharacter.cpp
#include "EnhancedInputComponent.h"
#include "EnhancedInputSubsystems.h"
#include "InputMappingContext.h"
#include "InputAction.h"
...

// Load Input Asset
static ConstructorHelpers::FObjectFinder<UInputMappingContext> InputMappingContextFinder
(TEXT("/Game/Input/IMC_Character.IMC_Character"));
if (InputMappingContextFinder.Succeeded())
{
	InputMappingContext = InputMappingContextFinder.Object;
}

static ConstructorHelpers::FObjectFinder<UInputAction> InputActoinMoveFinder
(TEXT("/Game/Input/IA_Moving.IA_Moving"));
if (InputActoinMoveFinder.Succeeded())
{
	Moving = InputActoinMoveFinder.Object;
}

static ConstructorHelpers::FObjectFinder<UInputAction> InputActoinLookFinder
(TEXT("/Game/Input/IA_Looking.IA_Looking"));
if (InputActoinLookFinder.Succeeded())
{
	Looking = InputActoinLookFinder.Object;
}

static ConstructorHelpers::FObjectFinder<UInputAction> InputActionJumpFinder
(TEXT("/Game/Input/IA_Jump.IA_Jump"));
if (InputActionJumpFinder.Succeeded())
{
	Jumping = InputActionJumpFinder.Object;
}
EnhancedInput 사용을 위한 헤더인 “EnhancedInputComponent.h”, “EnhancedInputSubsystems.h”를 추가한다. 만약에 해당 헤더를 추가했는데도 인식하지 못한다면 Build.cs 파일에 EnhancedInput을 추가하자.
생성자에서 미리 만들어둔 IA, IMC 에셋을 로드한다. 이 때 ConstructorHelpers의 FObjectFinder를 사용하여 해당 에셋을 탐색한다. “InputMappingContext.h”, “InputAction.h” 헤더를 추가한 이유는 FObjectFinder가 해당 클래스를 탐색하는데 필요하기 때문이다.
void ADefaultCharacter::BeginPlay()
{
	Super::BeginPlay();
	PlayerController = Cast<APlayerController>(GetController());
	if (PlayerController != nullptr)
	{
		UEnhancedInputLocalPlayerSubsystem* Subsystem = ULocalPlayer::GetSubsystem<UEnhancedInputLocalPlayerSubsystem>(PlayerController->GetLocalPlayer());
		if (Subsystem != nullptr) {
			Subsystem->AddMappingContext(InputMappingContext, 0);
		}
	}
}
BeginPlay에서는 캐릭터가 스폰되었을 때, 플레이어 컨트롤러의 Mapping Context를 앞서 로드한 InputMappingContext로 교체한다.
// Called to bind functionality to input
void ADefaultCharacter::SetupPlayerInputComponent(UInputComponent* PlayerInputComponent)
{
	Super::SetupPlayerInputComponent(PlayerInputComponent);

	if (UEnhancedInputComponent* Input = Cast<UEnhancedInputComponent>(PlayerInputComponent))
	{
		Input->BindAction(Moving, ETriggerEvent::Triggered, this, &ADefaultCharacter::Move);
		Input->BindAction(Looking, ETriggerEvent::Triggered, this, &ADefaultCharacter::Look);
		Input->BindAction(Jumping, ETriggerEvent::Triggered, this, &ACharacter::Jump);
	}

}
SetupPlayerInputComponent에서는 InputAction과 InputAction 입력이 들어왔을 때 실행할 함수의 바인딩을 진행한다. 앞서 말했듯 점프는 캐릭터의 것을 사용했으며 Move, Look은 본 클래스의 함수를 사용했다.
Move
void ADefaultCharacter::Move(const FInputActionValue& Value)
{
	if (PlayerController)
	{
		// 크기
		float FowardValue = Value.Get<FVector2D>().Y;
		float SideValue = Value.Get<FVector2D>().X;

		// 방향
		const FRotator Rotation = PlayerController->GetControlRotation();
		const FRotator YawRotation(0, Rotation.Yaw, 0);

		FVector FowardDirection = FRotationMatrix(YawRotation).GetUnitAxis(EAxis::X);
		FVector SideDirection = FRotationMatrix(YawRotation).GetUnitAxis(EAxis::Y);

		AddMovementInput(FowardDirection, FowardValue);
		AddMovementInput(SideDirection, SideValue);
	}
}
Move는 IA_Moving에서 오는 Axis2D 입력을 받아 동작한다. FInputActionValue는 bool, Axis2D, Axis3D의 모든 입력을 받을 수 있다.
움직임 입력값은 AddMovementInput을 통해 폰에 적용한다. 인자로는 월드 좌표계에서의 방향과 크기를 전달하였다.
방향은 컨트롤러의 방향을 가져와 사용한다. W를 눌러 전진하고자 할 때, 폰이 앞을 보고있더라도 컨트롤러(마우스를 오른쪽으로 돌림)가 오른쪽을 보고있다면 오른쪽으로 폰이 가속하는 이유가 여기 있다.
GetControlRotation()으로 가져온 컨트롤러의 회전에는 Pitch, Yaw, Roll값이 모두 존재한다. XY평면의 이동에서 필요한 회전값은 Z축을 기준으로 하는 Yaw 회전뿐이므로 YawRotation을 만들어 값을 분리한다. 분리한 값은 벡터 적용을 위해 회전 행렬로 전환한다. GetUnitAxis를 사용해 X,Y축 방향의 단위 벡터를 얻고, 해당 벡터를 FRotationMatrix로 생성한 회전 행렬에 적용하여 각각의 회전된 방향을 얻는다!
크기는 키보드에서 입력된 Vector2D를 받은 후, X/Y축 값을 분리하여 사용한다.
Look
void ADefaultCharacter::Look(const FInputActionValue& Value)
{
	if (PlayerController)
	{
		AddControllerYawInput(Value.Get<FVector2D>().X);
		AddControllerPitchInput(Value.Get<FVector2D>().Y);
	}
}
Look도 Axis2D를 사용하며, 동일하게 FInputActionValue로 값을 받아들인다. 별다른 전환 없이 컨트롤러의 회전값으로 추가하였다.
참고 자료
- https://dev.epicgames.com/documentation/ko-kr/unreal-engine/enhanced-input-in-unreal-engine?application_version=5.0
- Unreal Engine 5 - TPS Templete
- Unreal Engine 5 C++ Developer: Learn C++ & Make Video Games
- Paragon Asset - Drongo
- https://velog.io/@yoo06/UE5-Enhanced-Input-알아보기